In this lab, you will configure and deploy a highly available and secure website by using Amazon Web Services (AWS). First, you will configure network security for your environment, and then you will create and configure an Amazon Simple Storage Service (Amazon S3) bucket to store static assets. Next, you will create a fleet of EC2 instances by using an Auto Scaling group. Finally, you will integrate an Application Load Balancer into the Auto Scaling group.
Understand your environments
You will be using a newly launched AWS environment that contains a VPC named Lab VPC A.
Configure network security
In this exercise, you will configure security for the resources in a VPC. First, you will create a network access control list (ACL), and then you will create a security group.
Create a network access control list
In this task, you will create a network ACL.
- In the AWS Management Console, on the navigation bar, ensure that the selected region is Ohio.
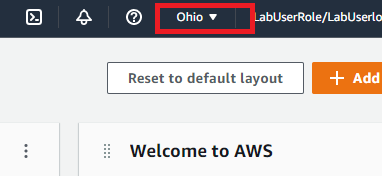
If US East (Ohio) is not selected as the region, you will not see the appropriate VPCs in the steps that follow.
-
In the AWS Management Console, in Search for services, search for and select VPC.
-
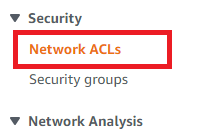
In the navigation pane, in Security, select Network ACLs.
-
Select Create network ACL.
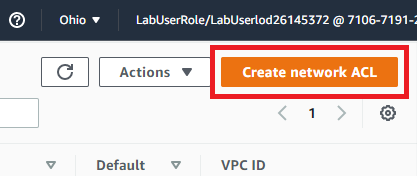
A network ACL acts as a firewall to control the flow of traffic in and out of the subnets in a VPC.
-
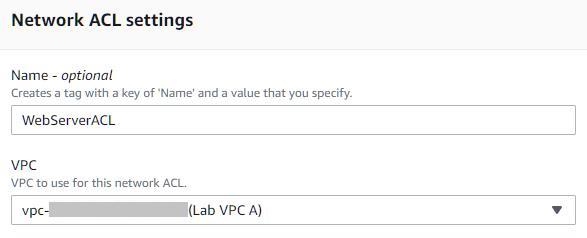
On the Create network ACL page, in Name, enter WebServerACL.
-
In VPC, select Lab VPC A, and then select Create network ACL.
-
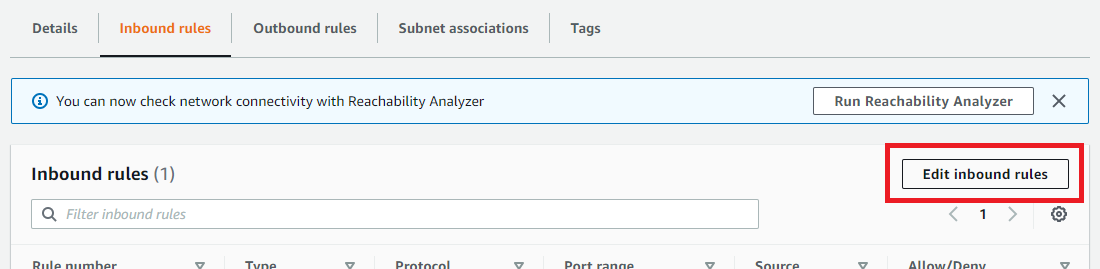
Select the WebServerACL check box, and then clear any other check boxes.
-
In the details pane, on the Inbound rules tab, select Edit inbound rules.
-
Select Add new rule.
-
In Rule number, enter 100, and then in Type, select HTTP (80).
-
Select Add new rule, in Rule number, enter 200, in Port Range, enter 32768-65535, and then select Save changes.
`Rule numbers are processed from the lowest number to the highest number, with the default rule of * being processed last. If a rule matches the incoming request, processing stops. Adding rule numbers that are separated by 100 allows you to insert other rules before or after the rule in order to affect processing.
-
In the details pane, on the Outbound rules tab, select Edit outbound rules.
-
Select Add new rule.
-
In Rule number, enter 100, in Type, select All Traffic, and then select Save changes.
-
On the Subnet associations tab, select Edit subnet associations.
-
Select all of the available subnets, and then select Save changes to complete the subnet association.
`You must create an outbound rule on a network ACL since network ACLs are stateless. This means that incoming traffic is not automatically allowed to be responded to.
Create a security group
In this task, you will create a security group.
-
In the VPC Management Console, in the navigation pane, in Security, select Security Groups.
-
Select Create security group.
-
In Security group name, enter WebSG.
-
In Description, enter Security group for HTTP access.
-
In VPC, ensure that Lab VPC A is selected.
-
In Inbound rules, select Add rule.
A security group acts as a virtual firewall for your instance to control inbound and outbound traffic.
- In Type, select HTTP, in Source, select Anywhere-IPv4, and then in the lower-right corner of the page, select Create security group.
Security groups are stateful. If a request is sent from an instance, the response traffic for that request is allowed to flow in regardless of inbound security group rules. A response to allowed inbound traffic is allowed to flow out, regardless of outbound rules.
Configure an Amazon S3 bucket
In this exercise, you will configure an Amazon Simple Storage Service (Amazon S3) bucket that can withstand a region failure. First, you will create a set of S3 buckets in different regions. Next, you will enable cross-region replication (CRR) for the bucket. Finally, you will configure public access for the bucket.
An Amazon S3 bucket is an object-based storage repository. The files are accessible from the internet by using a traditional HTML URL string. Objects have a maximum size of 5 TB each with no limit on total storage
Create an Amazon S3 bucket
In this task, you will create two Amazon S3 buckets in different regions.
-
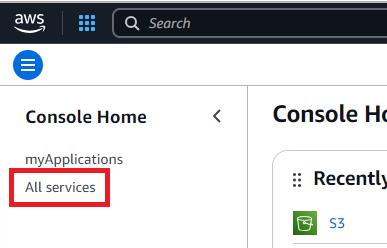
On the AWS Console Home page, select the hamburger menu in the upper left-hand corner, and then select All services.
-
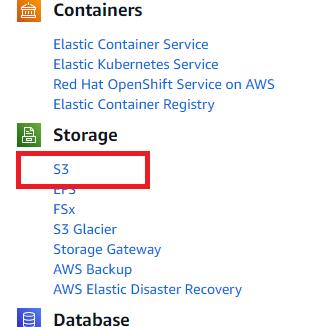
In All services, in Services by category, in Storage, select S3.
-
On the S3 Homepage, select Create bucket.
-
In AWS Region, ensure that US East (Ohio) is selected.
-
In Bucket name, enter bucket-53639020-ohio.
The bucket name must be globally unique.
- In Object Ownership, select ACLs enabled.
Ensure that ACLs enabled is selected or you will not be able to make objects public in a future task.
-
Review the default settings, and then select Create bucket to create the bucket.
You should now be able to see your bucket listed.
-
In AWS Region, select US West (Oregon).
-
Select Create bucket to create a second bucket.
Ensure that US West (Oregon) is selected. Both buckets must be in different regions to enable cross-region replication in the next task.
-
In Bucket name, enter bucket-53639020-oregon.
-
Review the default settings, and then select Create bucket to create the bucket.
Enable cross-region replication
In this task, you will enable cross-region replication (CRR) for an S3 bucket.
-
In the S3 Management Console, select bucket-53639020-ohio.
-
On the Properties tab, in Bucket Versioning, select Edit.
-
In Bucket Versioning, select Enable, and then select Save changes.
-
On the Management tab, in Replication rules, select Create replication rule.
You can use CRR to replicate your Amazon S3 objects to another AWS region anywhere in the world. Amazon S3 buckets are already highly durable and highly available in a single region. However, you may need even higher levels of durability or availability with data stored in another region. This allows users who are closer to a given region to access the data with lower latency.
-
In Replication rule name, enter EastWest.
-
In Source bucket, ensure that the Source bucket name is bucket-53639020-ohio.
-
In Source bucket, in Choose a rule scope, select Apply to all objects in the bucket.
-
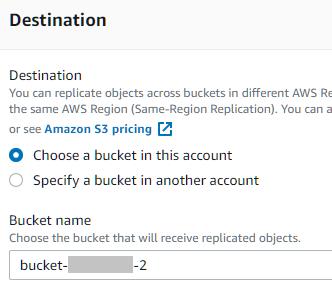
In the Destination, ensure that Choose a bucket in this account is selected, and then in Bucket name, enter bucket-53639020-oregon.
-
When prompted, select Enable bucket versioning to enable versioning in the destination bucket.
-
In the IAM role drop-down list, select Choose from existing IAM roles, and then select S3Replication Role-53639020.
-
Review the replication rule, and then select Save. When prompted to Replicate existing objects, select No, do not replicate existing objects, and then select Submit.
-
In the upper-left corner, select Amazon S3 to return to the S3 Management Console page.
-
Review the list of General purpose buckets.
-
Select bucket-53639020-ohio.
-
On your local computer, create a new document named welcome.txt.
-
At the beginning of the file, enter Welcome to the Lab Bucket!, and then save the file.
-
On the Objects tab, select Upload, and then select Add fi020-oregon bucket.
-
Ensure that the bucket contains the welcome.txt file.
`You may need to refresh the bucket contents to see the file, the replication should take less than one minute.
-
Open image.jpg, and then save it on your local computer.
-
Switch to the bucket-53639020-ohio bucket, and then upload the image.jpg file.
Configure public access for an S3 bucket
In this task, you will configure public access to an S3 bucket for static web site assets.
-
In the S3 Management Console, select bucket-53639020-ohio.
-
On the Permissions tab, in Block public access (bucket settings), select Edit.
-
Clear the Block all public access check box.
In most cases, S3 buckets should be secured to the point where only select authorized individuals should be allowed access. In some scenarios, you may need to allow public read access when the bucket is being used as a source for publicly accessible website content.
- Select Save changes, enter confirm, and then select Confirm.
The extra confirmation is there as a safeguard against accidental information exposure. You are allowing public access for this bucket since it will be storing static assets for a website.
-
On the Objects tab, select both files in the bucket.
-
Select Actions, select Make public using ACL, and then on the Make public page, select Make public.
Ensure you are configuring public access using ACL in the bucket-53639020-ohio bucket. bucket-53639020-oregon was not created with ACLs enabled, and will not allow public access through this method.
Configure security for a bucket
In this exercise, you will configure security for a bucket. First, you will create an (Identity and Access Management) IAM policy that will provide access to the S3 bucket for uploads. Next, you will create a user, and then you will create a permission boundary for the user. Finally, you will create a group, and then you will apply the IAM policy to the group.
Create a policy
In this task, you will create an IAM policy for the S3 bucket.
-
In the AWS Management Console, in Search for services, search for and select IAM.
-
In the navigation pane, in Access management, select Policies, and then select Create policy.
-
In Service, select Choose a service, and then search for and select S3.
-
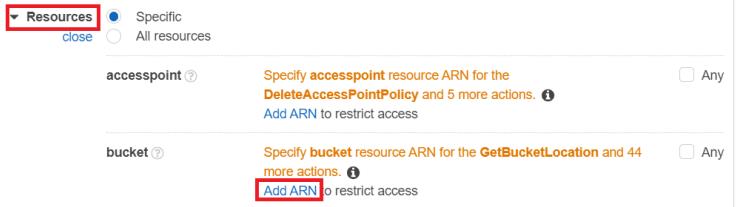
Select All S3 actions, expand Resources, and then in bucket, select Add ARN.
-
In Bucket name, enter bucket-53639020-ohio, and then select Add ARNs.
-
In the lower-right corner of the page select Next.
-
On the Review and create page, in Policy name, enter s3webadminpolicy, and then select Create policy.
Create a user
In this task, you will create a new user, and then you will set a permission boundary for the user.
-
In the navigation pane, in Access Management, select Users, and then select Create user.
-
In User name, enter webadmin, and then select the Provide user access to the AWS Management Console access - optional check box.

-
In Console password, select Custom password, and then enter LabPassw0rd!.
-
Clear the Users must create a new password at next sign-in - recommended check box, and then select Next.
-
On the Set permissions page, expand Set permissions boundary, and then select Use a permissions boundary to control the maximum permissions.
-
In Permissions policies, enter Lab in the search box, select the LabSecureAccess radio button, and then select Next.

Some users in the organization may need permissions to upload files to the S3 bucket, but do not need the privileges to do anything else.
- Review the configuration, and then select Create user.